Personalized mail dispatch
In GAPTEQ, you can use the “Mail Sender” component to send personalized emails directly from your application. In addition to the main addressee, CC and BCC recipients can be added.
In this article you will read the following content:
Configure the “Mail Sender” component
GAPTEQ sends personalized emails to the desired recipients via your mail server, triggered by any event. Design and texts can be freely designed with e-mail templates and equipped with placeholder variables.
1. Configure the mail server
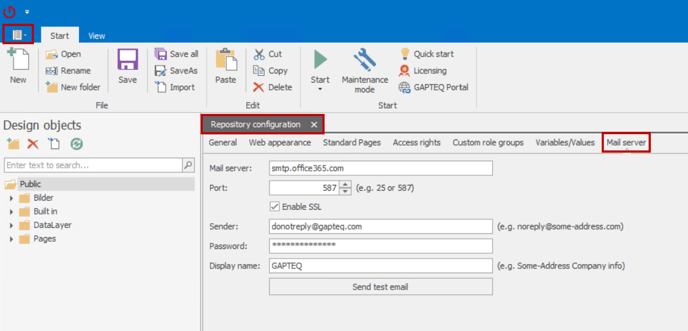
- Go to “Repository configuration” via the GAPTEQ main menu.
- You can make your individual configurations under “Mail server”.

Tip! You can use the “Send test email” button to send a test email and check all configurations.
2. Create email templates
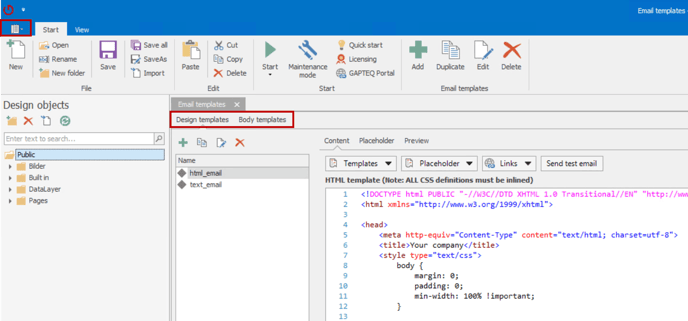
- To create your email template, go to “Email templates” via the GAPTEQ main menu.
- You can now create and configure individual designs and corresponding content texts via the “Design” and “Body templates”.
Design template
Note! You can create a new design template using the green plus button - several design templates can also be created if required.
- Via “Content” & the drop-down menu at “Templates” you can now import a template and customize it. You can completely customize the design via HMTL.

Tip! You can use the preview function to view your changes live.
Body templates
You can now use the body templates to design the text message of your e-mail:
Tip! Create a separate body template for each text variant.
- For personalized texts and links, you have the option of creating placeholder variables via the “Placeholder” tab (optional) - these are supplied with parameters when called (data links) and replaced with the transferred content.


3. Configure the “Mail Sender” component
- Drag and drop the GAPTEQ component “Mail Sender” into the page.
Attention! Once you have dragged and dropped the “Mail Sender” component onto the page, you will find it at the bottom of your page.
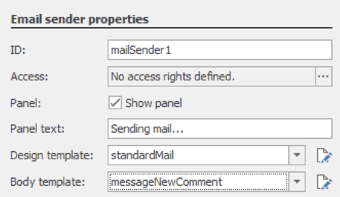
- Select the previously configured design and body template in the “Email sender properties”.

- In the data links of the “Mail Sender” component, you then fill in the required parameters with content.

- Now trigger the mail dispatch via any event (in this example, click on the button).

![GAPTEQ Logo links weiss.png]](https://knowledgebase.gapteq.com/hs-fs/hubfs/GAPTEQ%20Logo%20links%20weiss.png?width=223&height=54&name=GAPTEQ%20Logo%20links%20weiss.png)